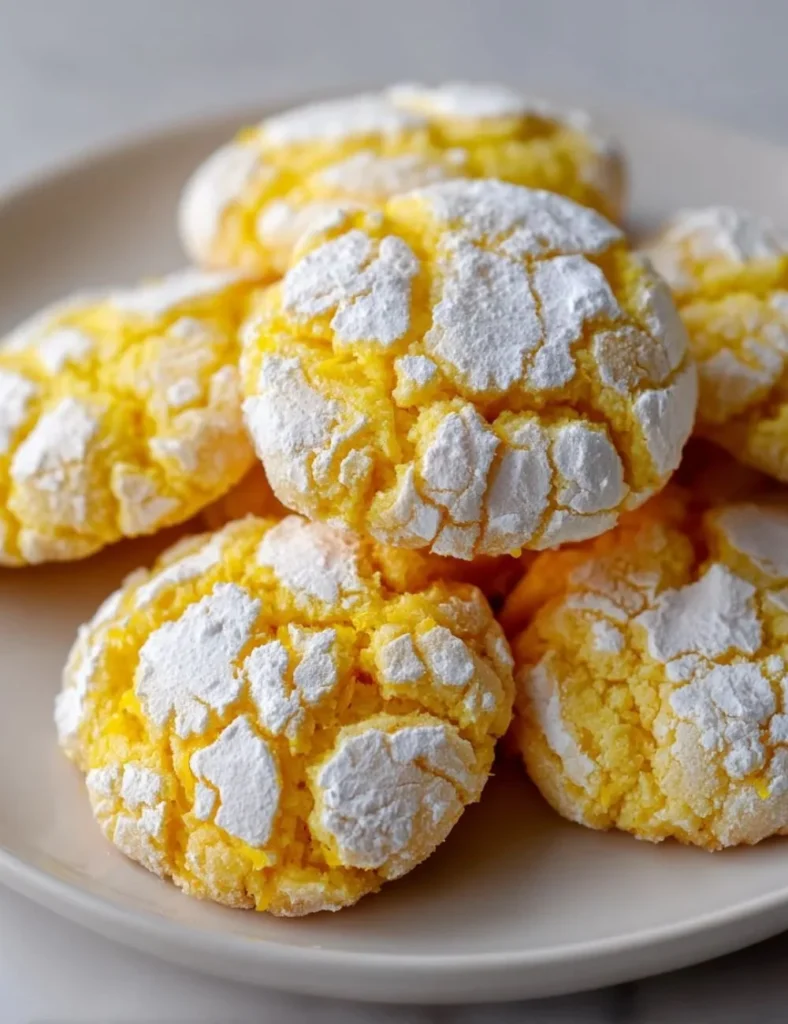
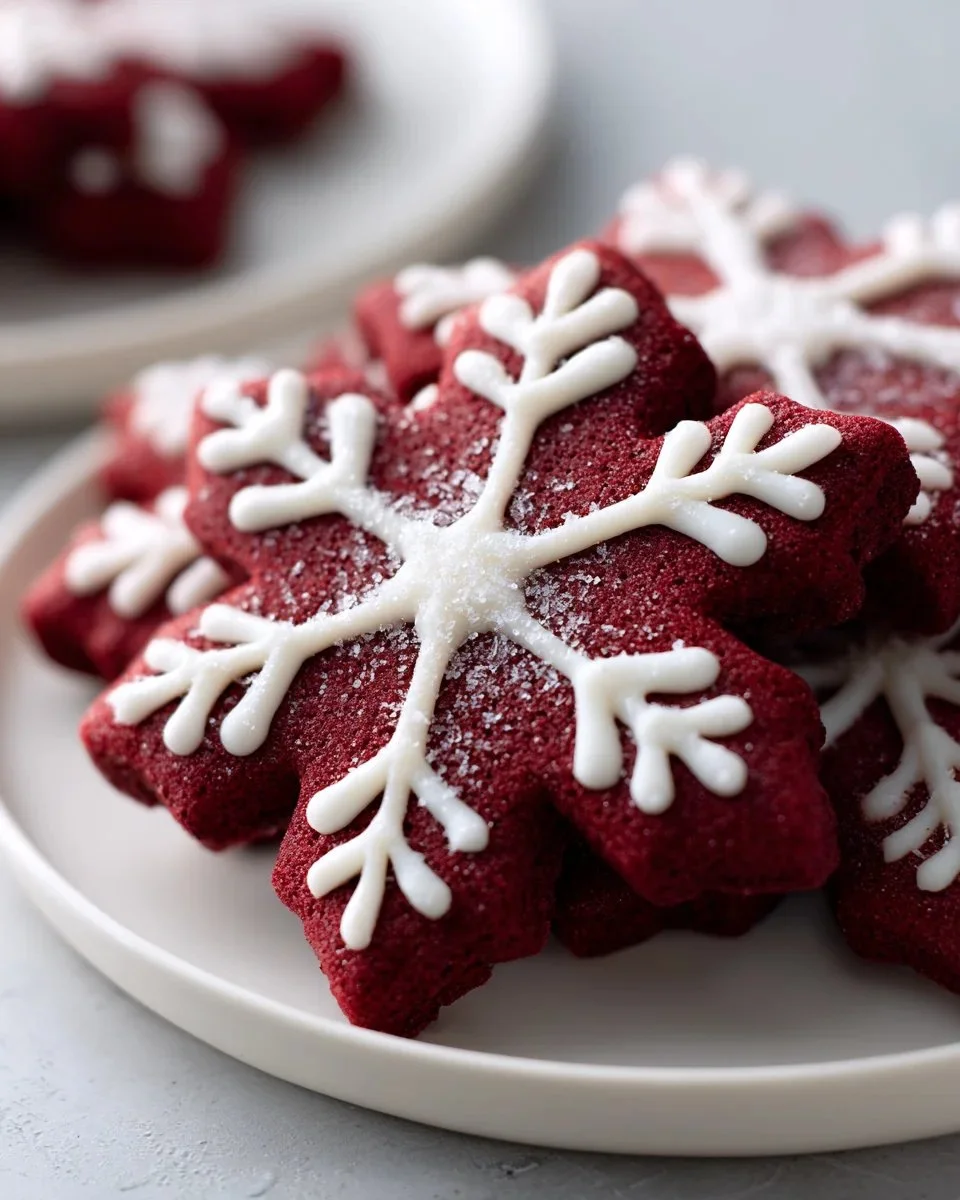
Bright, tender, and dusted like fresh snow, these Red Velvet Snowflake Cookies bring holiday cheer to any kitchen. They smell faintly of cocoa and vanilla, have a soft, slightly chewy center, and a gentle almond note that lifts the classic red velvet flavor. They’re easy to shape, bake quickly, and look lovely with a light sprinkling of powdered sugar that highlights their snowflake charm.
Recipe Information
- Prep Time: 15 minutes
- Cook Time: 12 minutes
- Total Time: 27 minutes
- Servings: Makes about 24 cookies
- Difficulty Level: Easy
Nutrition Information
Approximate per cookie (1 of 24)
- Calories per serving: 220 kcal
- Protein: 1.7 g
- Carbohydrates: 25 g
- Fat: 8.0 g
- Fiber: 0.6 g
- Sugar: 15 g
- Sodium: 76 mg
Why Make This Red Velvet Snowflake Cookies
These cookies are festive and simple. They deliver classic red velvet taste with a fine cocoa note and a soft, tender texture. The powdered sugar finish gives each cookie a snow-kissed look that’s perfect for holiday platters, gift tins, or a cozy night with hot cocoa. They are quick to mix and bake, and they freeze well for make-ahead gifting.
How to Make Red Velvet Snowflake Cookies
Follow clear steps to keep the dough tender and the color even. Work with softened butter, measure flour by spooning into the cup, and avoid over-mixing once you add the dry ingredients. Chill briefly if the dough feels too soft to shape. Use a light dusting of powdered sugar at the end for a delicate snowflake effect.
Ingredients:
- 2 1/2 cups all-purpose flour
- 1 tablespoon cocoa powder
- 1 teaspoon baking powder
- 1/2 teaspoon baking soda
- 1/4 teaspoon salt
- 1 cup unsalted butter, softened
- 1 1/2 cups granulated sugar
- 1/4 cup brown sugar, packed
- 1 large egg
- 1 tablespoon red food coloring
- 1 teaspoon vanilla extract
- 1/2 teaspoon almond extract
- Powdered sugar for dusting
Directions:
Step 1: Preparation
Preheat your oven to 350°F (175°C). Line a baking sheet with parchment paper or a silicone mat. In a medium bowl, whisk together the flour, cocoa powder, baking powder, baking soda, and salt until evenly combined.
Step 2: Mixing
In a large bowl, cream the softened butter, granulated sugar, and brown sugar until the mixture is light and fluffy. Beat in the egg, red food coloring, vanilla extract, and almond extract until well combined and smooth. Gradually add the dry ingredients to the wet mixture, mixing just until the dough comes together. Do not over-mix.
Step 3: Cooking
Roll the dough into balls about 1 to 1.25 inches in diameter and place them on the prepared baking sheet, spacing them about 2 inches apart. Flatten each ball slightly with the palm of your hand or the bottom of a glass. Bake in the preheated oven for 10–12 minutes, or until the edges are set and the centers look just set. The cookies will be soft; they firm up as they cool.
Step 4: Finishing
Allow the cookies to cool on the baking sheet for 5 minutes, then transfer them to a wire rack to cool completely. Once cooled, dust lightly with powdered sugar to create the snowflake look. Serve and enjoy your festive cookies!
How to Serve Red Velvet Snowflake Cookies
Serve these cookies with hot chocolate, coffee, or a glass of cold milk. Arrange them on a holiday platter with sprigs of rosemary or holly for contrast. For a party, pair them with cream cheese frosting as a dip or sandwich two cookies with a thin layer of white chocolate ganache for a special treat.
How to Store Red Velvet Snowflake Cookies
- Room temperature: Store in an airtight container for up to 4 days. Place a sheet of parchment between layers to keep them from sticking.
- Refrigerator: Store in an airtight container for up to 10 days. Bring to room temperature before serving for best texture.
- Freezer: Freeze baked cookies in a single layer on a sheet, then transfer to a freezer bag or container for up to 3 months. Thaw at room temperature. You can also freeze shaped raw dough balls on a tray, then transfer to a bag; bake from frozen, adding 1–2 minutes to the bake time.
Expert Tips for Perfect Red Velvet Snowflake Cookies
- Use room-temperature butter for even creaming and a light texture.
- Spoon and level flour into the cup; do not pack it. Too much flour makes dry cookies.
- If dough feels too soft to shape, chill for 15–20 minutes until firm.
- Don’t over-bake. Cookies should look slightly underdone in the center when you remove them.
- For a deeper red without too much food coloring, use gel food coloring instead of liquid.
- If you dislike almond extract, use an extra 1/2 teaspoon vanilla instead.
- For cleaner snowflake edges, dust with powdered sugar using a small fine mesh sieve.
Delicious Variations
- White-Chocolate Drizzle: Melt white chocolate and drizzle over cooled cookies for extra sweetness and visual contrast.
- Cream Cheese Filling: Sandwich two cookies with 1–2 tablespoons of cream cheese frosting for a classic red velvet pairing.
- Peppermint Twist: Add 1/4 teaspoon peppermint extract to the dough and top with crushed candy canes.
- Mini Chocolate Chips: Fold 1/2 cup mini white chocolate chips into the dough for pockets of sweetness.
- Dark Cocoa Boost: Use Dutch-processed cocoa for a richer chocolate flavor and slightly darker color.
Frequently Asked Questions
Q: Can I make the dough ahead of time?
A: Yes. You can refrigerate the dough for up to 48 hours in an airtight container. Let it warm slightly for easier scooping. You can also freeze shaped dough balls for up to 3 months and bake from frozen.
Q: My cookies spread too much. What went wrong?
A: Likely causes are too-soft butter, too-warm dough, or too much sugar. Chill the dough for 15–30 minutes before shaping. Make sure the oven temperature is accurate.
Q: Can I use natural cocoa instead of Dutch-processed?
A: Yes. The recipe uses a small amount of cocoa for flavor. Natural cocoa will work, but the slight acidity can change the final color. Expect a bit more tang and a slightly lighter red.
Q: How do I get a brighter red without a metallic taste from dye?
A: Use gel food coloring for concentrated color without adding liquid. Add color a little at a time until you reach the shade you like.
Q: Can I make these cookies gluten-free?
A: Yes. Substitute an equal weight of a 1:1 gluten-free flour blend that contains xanthan gum. Texture may vary slightly; chill dough if it feels very soft.
Q: Are these cookies kid-friendly to help make?
A: Absolutely. Kids can help roll dough balls, flatten them, and sprinkle powdered sugar. Keep an eye on oven time and use oven mitts for safety.
Q: Can I skip the powdered sugar topping?
A: Yes. They still taste great without it. Powdered sugar adds a festive look and a light sweetness, but it’s optional.
Conclusion
These Red Velvet Snowflake Cookies are an easy, festive way to brighten the holidays or any cozy gathering. They are tender, slightly chewy, and dusted like fresh snow for a pretty finish. Try the recipe, then experiment with a white-chocolate drizzle or cream cheese filling to make them your own. For a similar festive version and visual inspiration, see this recipe: Red Velvet Christmas Snowflake Cookies | Created by Diane.
PrintRed Velvet Snowflake Cookies
- Total Time: 27 minutes
- Yield: 24 cookies 1x
- Diet: Vegetarian
Description
Festive and easy Red Velvet Snowflake Cookies with a soft, chewy texture and a delicate powdered sugar finish.
Ingredients
- 2 1/2 cups all-purpose flour
- 1 tablespoon cocoa powder
- 1 teaspoon baking powder
- 1/2 teaspoon baking soda
- 1/4 teaspoon salt
- 1 cup unsalted butter, softened
- 1 1/2 cups granulated sugar
- 1/4 cup brown sugar, packed
- 1 large egg
- 1 tablespoon red food coloring
- 1 teaspoon vanilla extract
- 1/2 teaspoon almond extract
- Powdered sugar for dusting
Instructions
- Preheat your oven to 350°F (175°C). Line a baking sheet with parchment paper or a silicone mat. In a medium bowl, whisk together the flour, cocoa powder, baking powder, baking soda, and salt until evenly combined.
- In a large bowl, cream the softened butter, granulated sugar, and brown sugar until light and fluffy. Beat in the egg, red food coloring, vanilla extract, and almond extract until smooth. Gradually add the dry ingredients, mixing just until the dough comes together.
- Roll the dough into balls about 1 to 1.25 inches in diameter and place on the baking sheet, spacing them about 2 inches apart. Flatten each ball slightly. Bake for 10–12 minutes, until the edges are set and centers look just set.
- Allow cookies to cool on the baking sheet for 5 minutes, then transfer to a wire rack to cool completely. Dust with powdered sugar before serving.
Notes
Store in an airtight container at room temperature for up to 4 days, or refrigerate for up to 10 days. Cookies can also be frozen for up to 3 months.
- Prep Time: 15 minutes
- Cook Time: 12 minutes
- Category: Dessert
- Method: Baking
- Cuisine: American
Nutrition
- Serving Size: 1 cookie
- Calories: 220
- Sugar: 15g
- Sodium: 76mg
- Fat: 8g
- Saturated Fat: 5g
- Unsaturated Fat: 3g
- Trans Fat: 0g
- Carbohydrates: 25g
- Fiber: 0.6g
- Protein: 1.7g
- Cholesterol: 30mg